Partial DS Signature™ Workflow - Practice to Lab

3D Imaging/Digital Impression | SCAN + EXAMINE

clinician logo

Take a CBCT scan with AXEOS

Examine the CBCT images and diagnose the patient

Scan:

Select patient in Sidexis 4 Software

Select Field of View and exposure mode on Axeos

Patient is positioned, and exposure started

Examine:

CBCT Scan is automatically sent to Sidexis 4

Clinician examines images

clinician logo

Take an intraoral scan using Primescan

Check the scan data and discuss treatment plan with patient

Scan:

Start Connect Software and add/select Patient Data

Choose indication

Take an intraoral scan with Primescan (lower jaw, upper jaw, and buccal bite registration)

Examine:

Check the scan data and discuss treatment plan with patient

3D Imaging/Digital Impression | SHARE

clinician logo

Provide the scan data

  1. Export the CBCT scan (DICOM file) from Sidexis software and send it to the laboratory
  2. Export the intraoral scan (STL file) from Connect software and send it to the laboratory

Share: 3D Imaging - Axeos

Images are exported and share with lab through a HIPAA-compliant server (e.g., Dropbox)

Share: Digital Impressions - Primescan

Case upload will take place automatically

Choose lab and fill in order data

Final check of order data and order submission

Note: In case of the lab partner does not use DS CAD/CAM Lab software (InLab), they can access a digital Impression from Primescan via Inbox (web-based platform).

Digital Planning | DESIGN

clinician logo

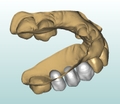
Design an ideal prosthetic bridge

  1. Import intraoral scan (STL file) into your preferred lab software
  2. Create the desired prosthetic bridge within the lab software
  3. Export the prosthetic design from the lab software (STL file)

Digital Planning | PLAN

clinician logo

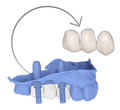
Import files to Simplant Pro

  1. CBCT scan (DICOM file)
  2. Intraoral scan (STL file)
  3. Prosthetic crown design (STL file)
  4. Merge CBCT scan with intraoral scan and prosthetic design

Lab starts case preparation in Simplant Pro and opens the 3D imaging data, then matches the STL data exported from the lab software: crown design and intraoral scan data.

Digital Planning | APPROVE

clinician logo

Plan the implant in Simplant Pro

  1. Add implants into the image according to bone situation and prosthetic outcome
  2. Add restorative components
  3. Create the surgical guide preview
  4. Get an approval from the dentist for your planning

Based on prosthetic set-up and available bone, lab plans implant sizes and positions as well as abutments and/or temporary cylinders

Plan is shared with Clinician via Simplant Viewer or screen sharing for Clinical Approval

Discuss immediate vs. delayed implant placement

If necessary, augmentation can be planned including measurement of regen material volumes

Digital Planning | ORDER

clinician logo

Order the surgical guide

  1. Upload files to orderdigitalsolutions.com and place the order
  2. Order the Simplant Core File in case you planned restorative components

Case upload will take place automatically after completing the "Request Simplant Guide" wizard in Simplant Pro.

Login to the Web Order pages, fill in case details, choose Simplant Guide or Simplant Guide File, add the Simplant Core File and submit order.

Digital Planning | APPROVE

clinician logo

Dentsply Sirona is creating designs

Simplant Guide File
Simplant Core File

The Simplant Guide is designed by Dentsply Sirona.

Your restorative component planning in Simplant Pro will be used for the Simplant Core File export by Dentsply Sirona.

Guide + Provisional Manufacture | DESIGN

clinician logo

Download guide file and core file

Download following files from orderdigitalsolutions.com:
  1. Simplant Guide File (STL file)
  2. Simplant Core File (STL file)
clinician logo

Design the temporary restoration

Design the temporary restoration in your preferred lab software based on the temporary component that was planned in Simplant Pro
Following steps can be done:
  1. Adapt prosthetic set-up (flanges)
  2. Create holes for Temporary components

Guide + Provisional Manufacture | FABRICATE

clinician logo

Manufacture the surgical guide

  1. Transfer the guide file to your printing software
  2. Print the surgical guide

Fabricate

Once planning is approved, lab finalizes design and orders: Simplant Guide File and sleeves to print Simplant SAFE guide and Simplant Core File to design and mill temporary bridge out of DS Multilayer PMMA

clinician logo

Manufacture the temporary restoration

  1. Send design file of the temporary restoration from the lab software to your lab manufacturing software​
  2. Mill the temporary restoration (Material: PMMA)

Fabricate

Once planning is approved, lab finalizes design and orders: Simplant Guide File and sleeves to print Simplant SAFE guide and Simplant Core File to design and mill temporary bridge out of DS Multilayer PMMA

Guide + Provisional Manufacture | SHARE

clinician logo

Provide surgical guide and a temporary restoration kit

  1. Provide the surgical guide to the dentist
  2. Provide a digitally designed temporary restoration kit to the dentist:
  • Temporary restoration
  • Temporary components (Temp cylinder/MultiBase abutments, Screws)
  • Composite material / glue

Augmentation | EXTRACT

clinician logo

Extract tooth

Perform tooth extractions if needed

Augmentation | IMMEDIATE GRAFTING OR SOCKET PRESERVATION

clinician logo

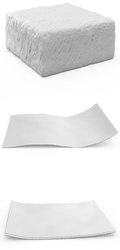
Perform augmentation with OSSIX products

OSSIX

Immediate grafting:

After extraction and implant placement:

  • If gap between bone and implant is smaller than 2mm, use OSSIX Volumax scaffold
  • If gap is larger than 2mm, use OSSIX Bone with or without membrane. Choose between OSSIX Plus or OSSIX Volumax depending on the gingival phenotype.

Socket preservation:

After extraction, graft socket using OSSIX Bone

If more than one wall is missing, the use of OSSIX Plus over OSSIX Bone is recommended

Size of cube can be chosen during surgical planning

Implant Placement | PLACE

clinician logo

Place the implant with the Surgical Guide

  1. Install the Simplant Guide onto the jaw
  2. Select the correct implant diameter and length
  3. Prepare your instruments for the surgical procedure
  4. Follow the surgical protocol for the guided surgery

Place:

Prepare the osteotomy with drills according to the drilling protocol

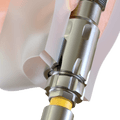
Pick up the implant with the Implant Driver EV for Guided Surgery

Install the implant with the Implant Driver EV for Guided Surgery using the drilling unit or manually with Torque Wrench

Implants with EV connection:

Astra Tech Implant EV

PrimeTaper EV Implant

OmniTaper EV Implant

Temporization | INSTALL

clinician logo

Place the temporary restoration

Place the Temporary Components and attach the temporary restoration utilizing the composite material from the lab

Partial

Multibase Abutments + Temp Cylinders + temporary bridge

Place MultiBase abutments on the implants and tighten the abutment screw

Place the Temp Cylinders on top of the MultiBase abutments

Protect surgical site around cylinders with Polymerization sleeves

Place pre-operatively fabricated temporary bridge on cylinders with the help of the bite index fabricated by your lab and fixate on cylinders with resin

Remove construction, polish and reposition tightening the Temp Cylinder Screws

Final Impression | SCAN + EXAMINE

clinician logo

Take final intraoral scan with Primescan

  1. A scan will provide tooth, implant and mucosa information of the patient
  2. Use IO FLO-S scan bodies for intraoral multiple teeth scanning

Scan:

Launch Connect Software and select Patient Data

Choose indication

Take an intraoral scan with Primescan (lower jaw, upper jaw, buccal bite registration)

Partial:

Scan the patient with the temporary restoration in place

Remove temporary restoration and the Temporary Cylinders, leaving the MultiBase abutments in place

Scan the patient only with the MultiBase abutments in place

Insert the abutment level IO-FLO-S onto the MultiBase abutments and take a third scan on the “scanbody upper jaw” and/or “scan body lower jaw” catalog following the scan protocol

Reinstall the temporary restoration

Examine:

Check the scan data

Final Impression | SHARE

clinician logo

Provide the intraoral scan data

Export the intraoral scan (STL file) from Connect software and send it to the laboratory

Final Impression | ORDER

clinician logo

Upload scans and order the Atlantis BridgeBase

  1. Lab uses Atlantis Scan Upload to transfer the STL´s to Atlantis WebOrder and finalize the order
  2. Order the Atlantis BridgeBase via Atlantis WebOrder

Order:

Case upload will take place automatically in Connect after login

Choose lab, fill in order data and submit order

Note: If the lab partner does not use DS CAD/CAM Lab software (inLab), they can access a Digital Impression from Primescan via Inbox (web-based platform).

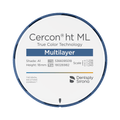
Lab will order a final Atlantis BridgeBase. Lab will finish the design and mill a Cercon ht ML BridgeBase esthetic secondary structure based on a Atlantis Core File.

clinician logo

Download Atlantis BridgeBase core file

Download the BridgeBase core file from Atlantis WebOrder
The core file includes: Scanjaw, Atlantis BridgeBase, Screwchannels and Diagnostic teeth set-up

Order:

Case upload will take place automatically in Connect after login

Choose lab, fill in order data and submit order

Note: If the lab partner does not use DS CAD/CAM Lab software (inLab), they can access a Digital Impression from Primescan via Inbox (web-based platform).

Lab will order a final Atlantis BridgeBase. Lab will finish the design and mill a Cercon ht ML BridgeBase esthetic secondary structure based on a Atlantis Core File.

Final Impression | DESIGN

clinician logo

Design the "secondary" of the final restoration

  1. Import the Atlantis BridgeBase core file into your preferred lab software
  2. Design the “secondary” based on Atlantis Core File while the Atlantis BridgeBase is being produced

Final Impression | FABRICATE

clinician logo

Manufacture the "secondary" and create final restoration

  1. Transfer the restoration design to your milling software
  2. Use DS Multilayer PMMA  for a try-in/temporary
  3. Use DS Cercon ht ML and mill the final zirconia restoration
  4. Finalize the restoration with Celtra Ceram (veneering ceramic) and DS Stain & Glaze

Final Impression | SHARE

clinician logo

Provide the final restoration

Cement the partial onto the Atlantis BridgeBase and send it to the dentist

Final Restoration | INSTALL

clinician logo

Place the final restoration

  1. Remove the temporary restoration from the patient’s mouth
  2. Place the final restoration you received from your laboratory
  3. Method: screw-retained

Install:

The lab will deliver the Atlantis BridgeBase restoration, complete with final esthetic secondary structure cemented on the metal suprastructure

Remove the temporary restoration and the Temporary Cylinders, leaving the MultiBase abutments in place

Secure the complete restoration and tighten the Atlantis BridgeBase with the bridge screws