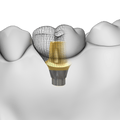
Single Tooth DS Signature™ Workflow - Practice to Lab

3D Imaging/Digital Impression | SCAN + EXAMINE

clinician logo

Take a CBCT scan with AXEOS

Examine the CBCT images and diagnose the patient.

Scan:

Select patient in Sidexis 4 Software

Select Field of View and exposure mode on Axeos

Patient is positioned, and exposure started

Examine:

CBCT Scan is automatically sent to Sidexis 4

Clinician examines images

clinician logo

Take an intraoral scan using Primescan

Check the scan data and discuss treatment plan with patient.

Scan:

Start Connect Software and add/select Patient Data.

Choose indication.

Take an intraoral scan with Primescan (lower jaw, upper jaw, and buccal bite registration).

Examine:

Check the scan data and discuss treatment plan with patient.

3D Imaging/Digital Impression | SHARE

clinician logo

Provide the scan data

  1. Export the CBCT scan (DICOM file) from Sidexis software and send it to the laboratory
  2. Export the intraoral scan (STL file) from Connect software and send it to the laboratory

Share: 3D Imaging - Axeos

Images are exported and share with lab through a HIPAA-compliant server (e.g., Dropbox)

Share: Digital Impressions - Primescan

Case upload will take place automatically

Choose lab and fill in order data

Final check of order data and order submission

Note: In case of the lab partner does not use DS CAD/CAM Lab software (InLab), they can access a digital Impression from Primescan via Inbox (web-based platform)

Digital Planning | DESIGN

clinician logo

Design an ideal prosthetic crown

Import intraoral scan (STL file) into your preferred lab software

Create the desired prosthetic crown within the lab software

Export the crown design from the lab software (STL file)

Digital Planning | PLAN

clinician logo

Import files to Simplant Pro

  1. CBCT scan (DICOM file)
  2. Intraoral scan (STL file)
  3. Prosthetic crown design (STL file)
  4. Merge CBCT scan with intraoral scan and prosthetic design

Lab starts case preparation in Simplant Pro and opens the 3D imaging data, then matches the STL data exported from the lab software: crown design and intraoral scan data.

Digital Planning | APPROVE

clinician logo

Plan the implant in Simplant Pro

  1. Plan the implant according to bone situation and prosthetic crown design
  2. Create the surgical guide preview.
  3. Get an approval from the dentist for your planning.

Based on prosthetic set-up and available bone, lab plans implant sizes and positions

Plan is shared with Clinician via Simplant Viewer or screen sharing for Clinical Approval

Discuss immediate vs delayed implant placement

If necessary, augmentation can be planned including measurement of regen material volumes

Digital Planning | ORDER

clinician logo

Order & download the guide file. Initiate the Atlantis order

  1. Upload files to orderdigitalsolutions.com and place the order
  2. Order the Simplant Guide File and the Atlantis Abutment
  3. Download the guide file (STL file)

Case upload will take place automatically after completing the "Request Simplant Guide" wizard in Simplant Pro

Login to the Web Order pages, fill in case details, choose Simplant Guide or Simplant Guide File, add the Atlantis abutment and submit order

Note: The Atlantis initial order will appear as a separate order line on your account after the Simplant Guide design is completed by Dentsply Sirona

clinician logo

Order the Atlantis Abutment and/or Atlantis Healing Abutment

Enter necessary abutment information and process the order in Atlantis WebOrder

Atlantis initial case details will appear automatically as a separate order line on your account

Complete the Atlantis case details and submit the order

Digital Planning | APPROVE

clinician logo

Review and approve the design

Review and modify the design proposal, made by Dentsply Sirona, in the Atlantis Editor and approve the order

The abutment is designed by Dentsply Sirona

Edit & approve the design in the Atlantis Editor

Guide + Provisional Manufacture | DESIGN

clinician logo

Download the Atlantis Abutment Core File

Select the right format for core file and download it for your lab software from Atlantis WebOrder

Note: This will be needed only in the case of creating a temporary crown, not with the Healing Abutment

clinician logo

Design the temporary crown

Import the Atlantis abutment core file into your preferred lab software and design the temporary crown

Guide + Provisional Manufacture | FABRICATE

clinician logo

Manufacture the surgical guide

  1. Transfer the guide file to your printing software
  2. Print the surgical guide

Fabricate:

Once planning is approved, lab finalizes design and orders: Simplant Guide File and sleeves to print Simplant SAFE guide, Atlantis CustomBase Abutment and Atlantis Core File to design and mill temporary crown out of DS Multilayer PMMA

clinician logo

Manufacture the temporary crown

  1. Transfer the crown file to your milling software
  2. Mill the temporary crown

Fabricate:

Once planning is approved, lab finalizes design and orders: Simplant Guide File and sleeves to print Simplant SAFE guide, Atlantis CustomBase Abutment and Atlantis Core File to design and mill temporary crown out of DS Multilayer PMMA

Guide + Provisional Manufacture | SHARE

clinician logo

Provide surgical guide and Atlantis Healing Abutment or Atlantis Abutment and temporary crown

  1. Provide the surgical guide to the dentist
  2. Receive the Atlantis Healing Abutment or Atlantis Abutment from Dentsply Sirona
  3. Provide the Healing Abutment to your dentist and/or the temporary crown together with the Atlantis Abutment

Augmentation | EXTRACT

clinician logo

Extract tooth

Perform tooth extractions if needed

Augmentation | IMMEDIATE GRAFTING OR SOCKET PRESERVATION

clinician logo

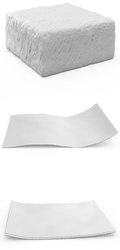
Perform augmentation with OSSIX products

OSSIX

Immediate grafting:

After extraction and implant placement:

  • If gap between bone and implant is smaller than 2mm, use OSSIX Volumax scaffold
  • If gap is larger than 2mm, use OSSIX Bone with or without membrane. Choose between OSSIX Plus or OSSIX Volumax depending on the gingival phenotype.

Socket preservation:

After extraction, graft socket using OSSIX Bone

If more than one wall is missing, the use of OSSIX Plus over OSSIX Bone is recommended

Size of cube can be chosen during surgical planning

Implant Placement | PLACE

clinician logo

Place the implant with the Surgical Guide

  1. Install the Simplant Guide onto the jaw
  2. Select the correct implant diameter and length
  3. Prepare your instruments for the surgical procedure
  4. Follow the surgical protocol for the guided surgery

Place:

Prepare the osteotomy with drills according to the drilling protocol

Pick up the implant with the Implant Driver EV for Guided Surgery

Install the implant with the Implant Driver EV for Guided Surgery using the drilling unit or manually with Torque Wrench

Implants with EV connection:

Astra Tech Implant EV

PrimeTaper EV Implant

OmniTaper EV Implant

Temporization | INSTALL

clinician logo

Place the Healing Abutment or temporary restoration

Place Healing Abutment and abutment screw or Atlantis Abutment, temporary crown and abutment screw you received from your laboratory

Install:

Single Tooth: Atlantis CustomBase + Crown Cement the temporary crown on the Atlantis abutment with temporary cement extra-orally. This step can be done by the dental technician or the restorative clinician.

Place and tighten the Atlantis abutment on the implant with either 15 or 25 Ncm as directed by the IFU.

Alternative: place an Atlantis Healing Abutment for delayed implant loading and await healing period with traditional temporization

Final Impression | SCAN + EXAMINE

clinician logo

Take final intraoral scan with Primescan

  1. Remove the Atlantis Abutment and crown (or the Atlantis Healing Abutment)
  2. Insert the IO FLO onto the implant and take a second scan
  3. Reinsert the Atlantis Abutment and temporary crown

Scan:

Launch Connect Software and select Patient Data

Choose indication

Take an intraoral scan with Primescan (lower jaw, upper jaw, buccal bite registration)

Remove the Atlantis CustomBase Abutment and crown (or the Atlantis Healing abutment) from the implant

Insert the IO-FLO for EV onto the implant and take a second scan on the “scanbody upper jaw” and/or “scanbody lower jaw” catalog

Reinsert the Atlantis Abutment and temporary crown

Examine:

Check the scan data

Final Impression | SHARE

clinician logo

Provide the intraoral scan data

Export the intraoral scan (STL file) from Connect software and send it to the laboratory

Final Impression | ORDER

clinician logo

Order Atlantis CustomBase Solution

  1. Access the previous order and create a “later order” in Atlantis WebOrder
  2. Upload the intraoral scan (STL file) received from the dentist
  3. Enter necessary abutment information and process the order

Order:

Case upload will take place automatically in Connect after login

Choose lab, fill in order data and submit order

Note: If the lab partner does not use DS CAD/CAM Lab software (inLab), they can access a Digital Impression from Primescan via Inbox (web-based platform).

Lab will order a final Atlantis CustomBase Abutment or Atlantis BridgeBase

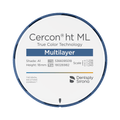
Lab will finish the design and mill a Cercon ht ML crown or BridgeBase esthetic secondary structure based on an Atlantis Core File

clinician logo

Review and approve the design

Review and modify the design proposal, made by Dentsply Sirona, in the Atlantis Editor and approve the order

Order:

Case upload will take place automatically in Connect after login

Choose lab, fill in order data and submit order

Note: If the lab partner does not use DS CAD/CAM Lab software (inLab), they can access a Digital Impression from Primescan via Inbox (web-based platform)

Lab will order a final Atlantis CustomBase Abutment or Atlantis BridgeBase

Lab will finish the design and mill a Cercon ht ML crown or BridgeBase esthetic secondary structure based on an Atlantis Core File

clinician logo

Download CustomBase Abutment CoreFile

Select the right format for core file download if for your lab software from Atlantis WebOrder

Order:

Case upload will take place automatically in Connect after login

Choose lab, fill in order data and submit order

Note: If the lab partner does not use DS CAD/CAM Lab software (inLab), they can access a Digital Impression from Primescan via Inbox (web-based platform).

Lab will order a final Atlantis CustomBase Abutment or Atlantis BridgeBase

Lab will finish the design and mill a Cercon ht ML crown or BridgeBase esthetic secondary structure based on an Atlantis Core File

Final Impression | DESIGN

clinician logo

Design the final crown

  1. Import the Atlantis CustomBase Abutment Core File into your preferred lab software
  2. Design the final crown based on the abutment core file in your lab software while the abutment is being produced

Final Impression | FABRICATE

clinician logo

Manufacture the final restoration

  1. Transfer the crown file to your milling software
  2. Use DS Cercon ht ML zirconia material to mill the crown
  3. Finalize the restoration with DS Universal Stain and Glaze or Celtra Cream (veneering ceramic)

Final Impression | SHARE

clinician logo

Provide the final restoration

Cement the crown onto the Atlantis CustomBase Abutment and send it to the dentist

Final Restoration | INSTALL

clinician logo

Place the final restoration

  1. Remove the temporary restoration from the patient’s mouth
  2. Place the final restoration you received from your laboratory

Install:

After removing the temporary restoration, insert the Atlantis CustomBase Abutment onto the implant, place the crown to check occlusion.

Cement the crown to the abutment extra-orally.

Install the final Atlantis CustomBase Abutment for EV with its crown and tighten the abutment screw.

Note: The final restoration can be cement-retained or screw-retained.